Configuring Check Point Application Control
Configuring Application Control
Login to the SmartDashboard
Click on the firewall object and enable “Application Control” by ticking the box. Click OK

Click the “Application & URL Filtering” tab
Click “Policy”
Add a new rule called “Block social network sites”
Define source as “Any” and destination “Internet”
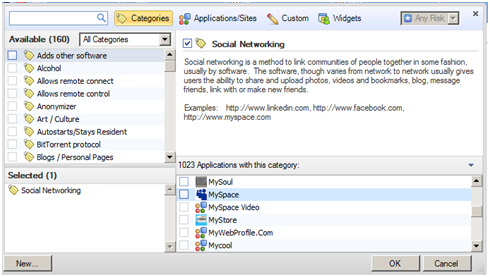
Add “Application/Sites”, a window will appear, search for “Social Networking” category. You can either select the entire category or specify certain sites you wish to block

The selected site(s) will appear in the bottom left hand window. Click Ok once happy
Select the “Action” as “Block” and display “Blocked Message”
Create another rule BELOW the “Block social network sites” and allow “Any Recognized” sites

Testing
On a client machine, open your internet browser
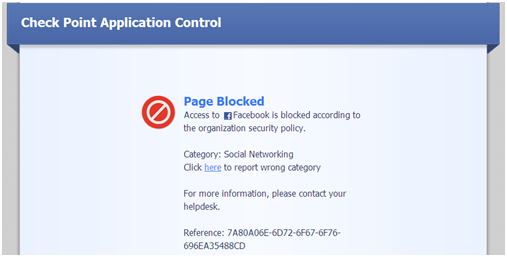
Browse to Facebook or Linkedin or Myspace or another social networking site. You should be presented with a “Page Blocked” webpage.

If required, the block screen message is fully customisable, to do this go to the “UserCheck” tab and edit
Open SmartView Tracker and select “Application and URL Filtering” security blade, you will be able to identify the sites and categories of the websites allowed or denied.

Integration with Identity Awareness
Refer to a previous blog post on how to configure Identity Awareness here
Once IA is configured and you have defined groups linked to Active Directory, you can modify the policy to create rules to allow/block sites based on group membership.

Troubleshooting
During testing I noticed the database was not up to date, this was confirmed on the “Overview” screen in the “Message and Action Items” on the right side of the screen. The error “Application database update failed on 1 Security Gateway” indicated the Firewall was unable to

“Application Control: Update failed. Could not reach ‘secureupdates.checkpoint.com’. Check DNS and Proxy configuration on the gateway.”
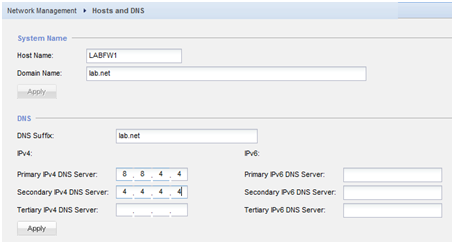
As the error states check DNS, simple fix just ensure the gateway itself is configured with DNS servers that can resolve external websites. This can be configured either using the WebGUI or CLI
Using Gaia the commands are:-
LABFW1> set dns primary ipv4 –address X.X.X.X
LABFW1> set dns secondary ipv4-address X.X.X.X
From the WebGUI

After a while the Application Control database should automatically update itself.