Check Point backup feature allows backing up the configuration of the Gaia OS and of the Security Management server database, or restoring a previously save configuration.
- It allows to schedule backup for daily, weekly and yearly.
- It is very useful while doing RMA or reinstallation.
The configuration is saved to a .tgz format in the following directory of the firewall.
/var/log/CPbackup/backups/
Note: Backups can be stored locally, or remotely on a TFTP / SCP / FTP server. Backups can be collected manually, or based on a schedule.
Backing Up and Restoring – Gaia Portal
To create a backup (Gaia Portal)
Login to WebGUI

In the tree view, click Maintenance > System Backup.

View last backup status > click on view last backup tab

To create a new backup please click on Backup tab

The New Backup window opens.
Select the location of the backup file:
This appliance: save backup file locally
Management: to connected management server
SCP server: Specify the IP address, user name and password of WinSCP server.
FTP server: Specify the IP address, user name and password of FTP server.
TFTP server: Specify the IP address of TFTP server.

Note: We will save file locally.

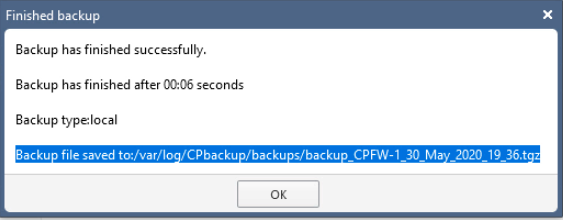
New backup file created

You can find location of backup file
You can export locally save file to your connected PC.
Click on export TAB

Click on ok.

It will download the .tgz file on connected PC.

You can always check last backup status by clicking on View last backups tab

To restore the backup:
You can Import configuration file to firewall using import tab and click on restore to restore previous configuration to firewall. Firewall will reboot with new configuration.

Click on import tab

Select .tgz format file to restore the configuration. Click on import and it will import file to local firewall.


Now you restore previous configuration using this backup file.
Select backup file which need to be backup
Click on restore (firewall reboot automatically)


Note: you can also restore backup from remote server. However, I recommend to restore configuration using local file to avoid any issue.
Backing Up and Restoring – in Clish
To create a backup from CLI
Use one of the following commands, depending on the backup type:
- To save a backup locally:
- add backup local
- To save a backup on a remote server using FTP:
- add backup ftp ip VALUE path /some/path/ username VALUE password plain
- To save a backup on a remote server using TFTP:
- add backup tftp ip VALUE
- To save a backup on a remote server using SCP:
- add backup scp ip VALUE path /some/path/ username VALUE password plain
Command Parameters:
- ip VALUE – The IP address of the remote server.
- username VALUE – User name required to log in to the remote server.
- password plain – At the prompt, enter the password for the remote server.
- /some/path/ – Path to stored backup on FTP server
Example:
To check backup files

To create new backup file

Select local option

Backup process successful

To show current backup files

Notes:
- Backup configurations on Check Point appliances are stored in /var/log/CPbackup/backups/
- Backup configurations on Open Servers are stored in /var/CPbackup/backups/
To restore configuration from CLI
Steps Required:
- Run the appropriate restore command (see Commands below).
- Monitor progress
- Once operation is done reboot the machine.
- Install policy.
Commands:
Use one of the following commands, depending on the backup type.
- To restore a local backup:
- set backup restore local <TAB>
- To restore a backup from a remote server using FTP:
- set backup restore ftp ip VALUE path /some/path file VALUE username VALUE password plain
- To restore a backup from a remote server using TFTP:
- set backup restore tftp ip VALUE file VALUE
- To restore a backup from a remote server using SCP:
- set backup restore scp ip VALUE path /some/path file VALUE username VALUE password plain
Command Parameters:
- local <TAB> – The <TAB> does an auto-complete on the name and location of the backup file.
- ip VALUE – The IP address of the remote server.
- username VALUE – User name required to log in to the remote server.
- password plain – At the prompt, enter the password for the remote server.
- /some/path – Path to stored backup.
Example:
To check available backup files

To restore backup file

It will automatically restart the firewall after restoration of configuration.

Important: Once restore is done, you must reboot and install policy in order to apply the new configuration.
Configuring Scheduled Backups – Gaia Portal
To add a scheduled backup from WEB GUI
Click on add scheduled backup

Enter backup name
You can schedule backup on Daily, Weekly and Yearly basis
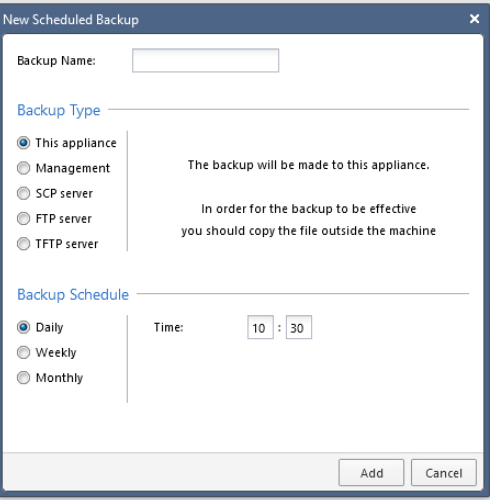
I have created daily backup locally as below


It will automatically trigger the back on set time daily.

Configuring Scheduled Backups – in Clish
To add a backup using CLI
- Use one of the following commands to create the backup task, depending on the backup type:
- To add a scheduled backup locally:
- add backup-scheduled name VALUE local
- To add a scheduled backup on a remote server using FTP:
- add backup-scheduled name VALUE ftp ip VALUE path /some/path/ username VALUE password plain
- To add a scheduled backup on a remote server using SCP:
- add backup-scheduled name VALUE scp ip VALUE path /some/path/ username VALUE password plain
- To add a scheduled backup on a remote server using TFTP:
- add backup-scheduled name VALUE tftp ip VALUE
- To add a scheduled backup locally:
- Next, use one of the following commands to schedule the backup task:
- To configure a daily backup schedule:
- set backup-scheduled name VALUE recurrence daily time VALUE
- To configure a monthly backup schedule:
- set backup-scheduled name VALUE recurrence monthly month VALUE days VALUE time VALUE
- To configure a weekly backup schedule:
- set backup-scheduled name VALUE recurrence weekly days VALUE time VALUE
- To configure a daily backup schedule:
Example:


To check scheduled backup
