Check Point Gaia – Link Aggregation
Below is instructions on how to setup either HA or Load Sharing, using Check Point R77.10 Gaia. Please test in a lab environment before implementation in production.
Setting up a High Availbility (Active/Backup) interface bond
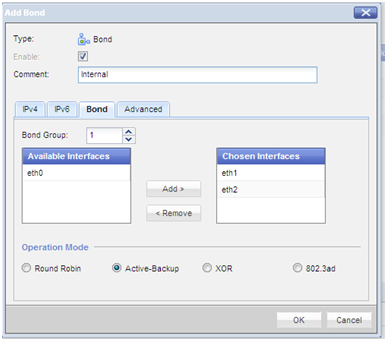
Create a bond group 1 and add interfaces eth1 and eth2. Define the mode, in this instance the bond with act in Active/Backup configuration.
add bonding group 1
set interface bond1 state on
add bonding group 1 interface eth1
add bonding group 1 interface eth2
set bonding group 1 mode active-backup
set interface bond1 state on
add bonding group 1 interface eth1
add bonding group 1 interface eth2
set bonding group 1 mode active-backup

Specify eth1 as the Active interface
set bonding group 1 primary eth1

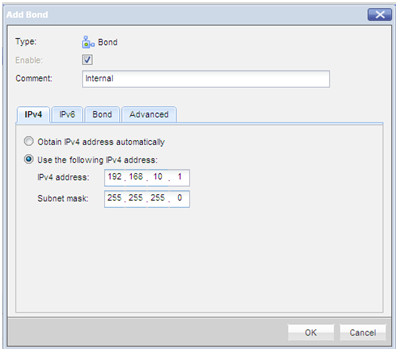
Enable the bond (if not already enabled) and physical interfaces and assign an IP address. Optionally set a comment to help identifying the bond
set interface bond1 ipv4-address 192.168.10.1 mask-length 24
set interface bond1 comments “Internal”
set interface bond1 comments “Internal”

Enable the physical interfaces (if not already enabled)
set interface eth1 state on
set interface eth2 state on
set interface eth2 state on
The HA bond is now configured and should work, perform some tests by unplugging an interface and verifying there is still connectivity.
An HA bonded interface does NOT require any special configuration on the switch the physical interface is plugged into. The switchport interfaces should however we configured identically, with the same VLAN ID and it would be advisable to enable “portfast”.
Setting up a Load Sharing (Active/Active) interface bond
Create a bond group 1 and add interfaces eth1 and eth2. Define the mode, in this instance the bond with act in Active/Active configuration.
add bonding group 1
set interface bond1 state on
add bonding group 1 interface eth1
add bonding group 1 interface eth2
set bonding group 1 mode 8023AD
set interface bond1 state on
add bonding group 1 interface eth1
add bonding group 1 interface eth2
set bonding group 1 mode 8023AD

On a Cisco switch an etherchannel will need to be created. Create the etherchannel using LACP
port-channel load-balance src-dst-ip
interface range fastethernet 0/1-2
channel-group 1 mode active
channel-protocol lacp
exit
interface range fastethernet 0/1-2
channel-group 1 mode active
channel-protocol lacp
exit
interface port-channel 1
description “FIREWALL PORT CHANNEL”
switchport mode access
switchport access vlan 10
spanning-tree portfast
exit
description “FIREWALL PORT CHANNEL”
switchport mode access
switchport access vlan 10
spanning-tree portfast
exit
The Load Sharing (Active/Active) bond is now configured and should work, perform some tests by unplugging an interface and verifying there is still connectivity. In my tests when unplugging an interface in a Load Sharing configuration there was no noticeable missed pings, compared to an HA configuration when I observed 1 missed ping.
Troubleshooting commands
From expert mode execute the following command – “cat /proc/net/bonding/bond1”
NOTE – “bond1” is the name of the bond previously create, change to name of your bond
