Policy via Check Point SmartDashboard
Basic
Rules
There are two basic rules used by nearly all
Security Gateway Administrators: the Cleanup Rule and the Stealth Rule. Both
the Cleanup and Stealth Rules are important for creating basic security
measures, and tracking important information in SmartView Tracker.
Cleanup Rule - The Security Gateway follows the principle, "That
which is not expressly permitted is prohibited." Security Gateway drop all
communication attempts that do not match a rule. The only way to monitor the
dropped packets is to create a Cleanup Rule that logs all dropped traffic. The
Cleanup Rule, also known as the "None of the Above" rule, drops all
communication not described by any other rules, and allows you to specify
logging for everything being dropped by this rule.
Stealth Rule - To prevent any users from connecting directly to the
Gateway, you should add a Stealth Rule to your Rule Base. Protecting the
Gateway in this manner makes the Gateway transparent to the network. The
Gateway becomes invisible to users on the network.
In most cases, the Stealth Rule should be
placed above all other rules. Placing the Stealth Rule at the top of the Rule
Base protects your Gateway from port scanning, spoofing, and other types of
direct attacks. Connections that need to be made directly to the Gateway, such
as Client Authentication, encryption and Content Vectoring Protocol (CVP)
rules, always go above the Stealth Rule.
Implicit/Explicit Rules
The Security Gateway creates a Rule Base by
translating the Security Policy into a collection of individual rules. The
Security Gateway creates implicit rules, derived from Gloabl Properties and
explicit rules, created by the Administrator in the SmartDashboard.
An explicit
rule is a rule that you create in the Rule Base. Explicit rules are displayed
together with implicit rules in the correct sequence, when you select to view
implies rules. To see how properties and rules interact, select Implied Rules
from the view menu. Implicit rules appear without numbering, and explicit rules
appear with numbering.
Implicit rules are defined by
the Security Gateway to allow certain connections to and from the Gateway, with
a variety of different services. The Gateway enforces two types of implicit
rules that enable the following:
* Control Connections
* Outgoing packets
Rule Base Management
As a network infrastructure grows, so will the
Rule Base created to manage the network's traffic. If not managed properly,
Rule Base order can affect Security Gateway performance and negatively impact
traffic on the protected networks. Here are some general guidelines to help you
manage your Rule Base effectively.
Before creating a Rule Base for your system,
answer the following questions:
1. Which objects are in the network? Examples
include gateways, hosts, networks, routers, and domains.
2. Which user permissions and authentication
schemes are needed?
3. Which services, including customized
services and sessions, are allowed across the network?
As you formulate the Rule Base for your Policy, these tips
are useful to consider:
* The Policy is enforced from top to bottom.
* Place the most restrictive rules at the top of the
Policy, then proceed with the generalized rules further down the Rule Base.
If more permissive rules are located at the top, the restrictive rule may not
be used properly. This allows misuse or unintended use of access, or an
intrusion, due to improper rule configuration.
* Keep it simple. Grouping objects or combining rules makes for visual clarity and
simplifies debugging. If more than 50 rules are used, the Security Policy
becomes hard to manage. Security Administrators may have difficulty determining
how rules interact.
* Add a Stealth
Rule and Cleanup Rule first to each new Policy Package. A Stealth Rule
blocks access to the Gateway. Using an Explicit Drop Rule is recommended for
logging purposes.
* Limit the use of the Reject action in rules. If a rule is configured to reject, a
message is returned to the source address, informing that the connection is not
permitted.
* Use section
titles to group similar rules according to their function. For example,
rules controlling access to a DMZ should be placed together. Rules allowing an
internal network access to the Internet should be placed together and so on.
This allows easier modification of the Rule Base, as it is easier to locate the
appropriate rules.
* Comment
each rule! Documentation eases troubleshooting, and explains why rules
exist. This assist when reviewing the Security Policy for errors and
modifications. This is particularly important when the Policy is managed by
multiple Administrators. In addition, this Comment option is available when
saving database version. See the Database Revision Control section in this
chapter.
* For efficiency, the most frequently used
rules are placed above less-frequently used rules. This must be done carefully,
to ensure a general-accept rule is not placed before a specific-drop rule.
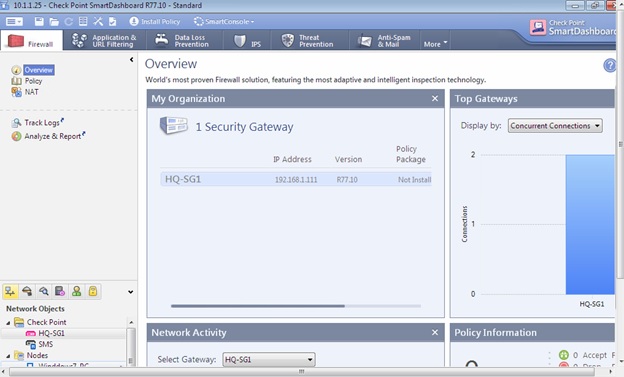
Under Firewall tab, there’s no policy package installed by default on the security gateway.
There are two ways to create a firewall rule: use the Add Rule at the Bottom or Add Rule at the Topicons OR click Launch Menu > Rules > Add Rule > select Bottom or Top.

Double-click on the empty Name field and give a name Allow Management Traffic for to help in troubleshooting and click OK.

You can drag and drop a Network Object under the Rule fields, such as Source, Destination, etc. OR click the plus (+) symbol, search for the Network Object or create a new Network Object by clickingNew.


Under Service, you could either click on the serving tray icon for the Service Objects OR click on the plus (+) symbol, choose either TCP or UDP (or both) and search for the specific port or service such as SSH.

Under Action, do a right-click and choose accept (permit).

You can drag the columns to display Track and under Track, do a right-click and choose Log to generate logs on SmartTracker.

Under Install On, the default behavior is to push the rules on all security gateways. Double-click and choose Targets and select the Security Gateway (in this case HQ-SG1).


Create a Stealth Rule to drop and log malicious users trying to access the Security Gateway device.
.

Create a rule to allow and log all inside users to go out to any destinations. It’s not practical to enable logging for inside users in a real environment.

Lastly, create a Cleanup rule to drop and log traffic not hitting the rules above it (implicit deny in Cisco).

You save the firewall policies either in three ways: go to Launch Menu > File > Save, do a Ctrl+S OR click on the floppy disk icon beside the Launch Menu.

You can view the Implicit Rules in either two ways: go to Launch Menu > Policy > Global PropertiesOR click Edit Global Properties using the wrench and screwdriver icon. For this lab I've enabled log traffic hitting the Implied Rule (not advisable in a production network).


To view the Implied Rules, go to Launch Menu > View > Implied Rules.


There’s an initial policy to drop ICMP on the Security Gateway. You can view the initial policy (and date/time when it was pushed) by issuing the fw stat CLI command on the Security Gateway. To remove the policy for troubleshooting purpose, we issue the fw unloadlocal command.


To revert back the initial policy, issue the fw fetch localhost command.

To save and name the policy and name it Policy-1 (no space allowed) and it will change the name from Standard to the new policy name. Then we push the policy rules by either two ways: go toLaunch Menu > Policy > Install or click on the Install Policy icon.


It will show a list of Security Gateway that you want to install our policy. Under Advance > Revision Control, we can backup by creating a database for all the objects and rules we’ve just created. This is useful when doing a rollback.
In this case I should've uncheck the Desktop Security since it will show an installation ended with an error afterwards.


Verify the new policy installed using the fw stat command. You can also install a new policy from the Security Management Server (SMS) using the fw fetch <SMS IP ADDRESS> command.
